
- You can create a chatbot for free using a no-code builder, without hiring a developer or building a custom application.
- Define what you want your chatbot to handle, such as answering FAQs, troubleshooting technical issues, recommending products, or capturing leads.
- Build a conversation flow with messages, buttons, conditions, and intents to guide customers to relevant answers.
- Connect your website pages, FAQs, documents, and other business information so AI responses can answer questions about your products and services.
- Publish your chatbot and install it on your website so visitors can use it. Test the live widget on desktop and mobile before launch.
- Improve your chatbot after launch by reviewing unanswered questions, answer accuracy, task completion, and conversation drop-offs.
Creating a support chatbot no longer requires a developer or a big budget. With the right no-code chatbot builder, you can create your own AI chatbot for free, customize its responses, and automate customer service.
In 2026, you can build a chatbot that answers customer questions, provides technical support, guides shoppers through product choices, captures leads, and helps automate repetitive conversations without writing code.
This guide walks you through the process, from choosing what your chatbot should handle and building its conversation flow to adding your business information, testing its responses, and publishing it on your website.
What You Need Before You Create a Chatbot
Before building your AI chatbot, identify the customer support tasks you want to improve. You should also know which information the chatbot needs to answer questions and when it should direct customers to your team.
Decide what you want your chatbot to do
You can automate different tasks with AI chatbots. Start with a business goal you want to improve, such as reducing repetitive support requests, helping customers troubleshoot common issues, or making it easier for website visitors to choose the right product.
For example, a software company might want a chatbot to provide round-the-clock technical support for common issues. It could:
- Answer setup questions.
- Explain how to use specific features.
- Walk users through basic troubleshooting.
- Direct customers to a support agent when an issue requires account access or specialist help.
An online store might use a chatbot to improve the customer’s buying journey. It could:
- Help shoppers compare products.
- Explain sizing or compatibility.
- Answer questions about shipping and returns.
- Guide them towards the right product.
- Help customers find delivery information or understand the store’s return policy after a purchase.
Write down the questions customers ask most often and the tasks you want to automate. For each one, decide what a successful outcome looks like. That might mean a customer finds the right troubleshooting steps without contacting support, or a shopper gets enough product information to make a purchase decision.
Also, identify situations that need human assistance. A chatbot can handle routine questions, but sensitive account issues, unusual technical problems, and requests that require a person’s judgment may need to go to your team.
If you want to know more about how chatbots work or what business goals you can achieve with customer support automation, see our guide to AI chatbots.
Choose where to make your chatbot available
Decide where customers should be able to use the chatbot, such as your website or a supported messaging channel like WhatsApp. The channel determines how customers access the chatbot and which deployment requirements you need to meet.
A website chatbot can help visitors compare products before buying, while a support chatbot on a messaging channel can answer questions where customers already contact your business.
Most providers allow you to deploy the same chatbot on multiple channels, so your flows and answers stay consistent everywhere.
Gather the information your chatbot needs
Your chatbot needs reliable information to answer questions about your business. Depending on its purpose, this could include product pages, troubleshooting steps, pricing, FAQs, shipping details, return policies, or service information.
Use the actual information customers need rather than relying on broad instructions. For example, telling a chatbot to help with refunds doesn't explain the return window, eligibility requirements, or exceptions. Providing the current refund policy gives it the details needed to answer those questions.
Check for outdated or conflicting information before connecting your sources. If two pages give different return windows or pricing details, resolve the inconsistency first. Start with the information relevant to your main use cases, then add more as you identify gaps.
Choose How You Want to Build Your Chatbot
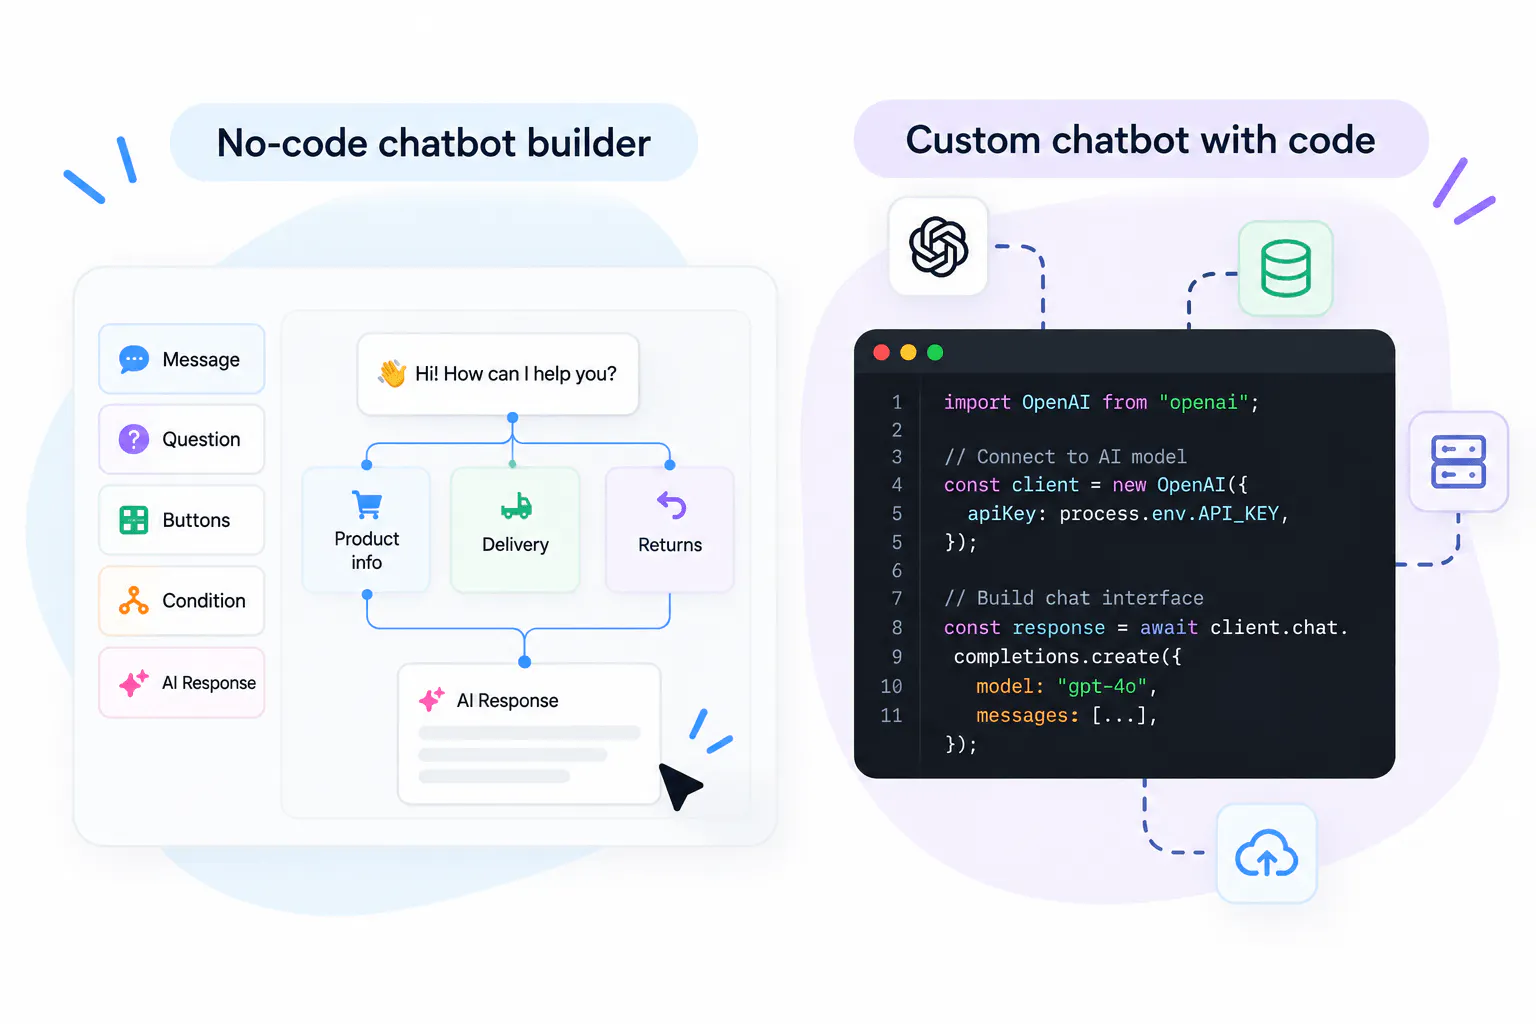
You can build a chatbot using a no-code builder or develop a custom application with code. The right option depends on how much control you need, the complexity of your use case, and the resources available to build and maintain it.
Use a no-code chatbot builder
A no-code builder lets you create conversations through a third-party visual interface like Chatling’s chatbot builder instead of programming every interaction. You can arrange messages, questions, buttons, conditions, and AI responses to control how the chatbot helps customers.
Suppose you want to automate common questions for an online store. You could offer options for product information, delivery, and returns, then guide customers to the relevant answer. If a shopper has a question that doesn't fit those options, an AI response could use your product and policy information to help.
Build a custom chatbot with code
Building a chatbot from scratch gives you more control over its interface, application logic, and integrations. It also means your team is responsible for developing and maintaining those components.
Depending on your approach, you'll need to connect an AI model or API, build the chat interface, manage conversation history, connect data sources, and deploy the application. Hosting and API usage may also cost a periodic fee, even if you use free development tools.
Custom development can make sense when you need functionality that an existing builder doesn't support. If your goal is to create a customer-facing chatbot without maintaining a custom application, a no-code builder is generally a more straightforward option.
How to Create a Chatbot for Free in 6 Steps
Chatling lets you create a chatbot through a visual Builder, connect relevant business information, and publish it without writing code. Here's how to set up a chatbot for a customer support, sales, or other suitable use case.
Step 1: Create your Chatling account to start building your chatbot
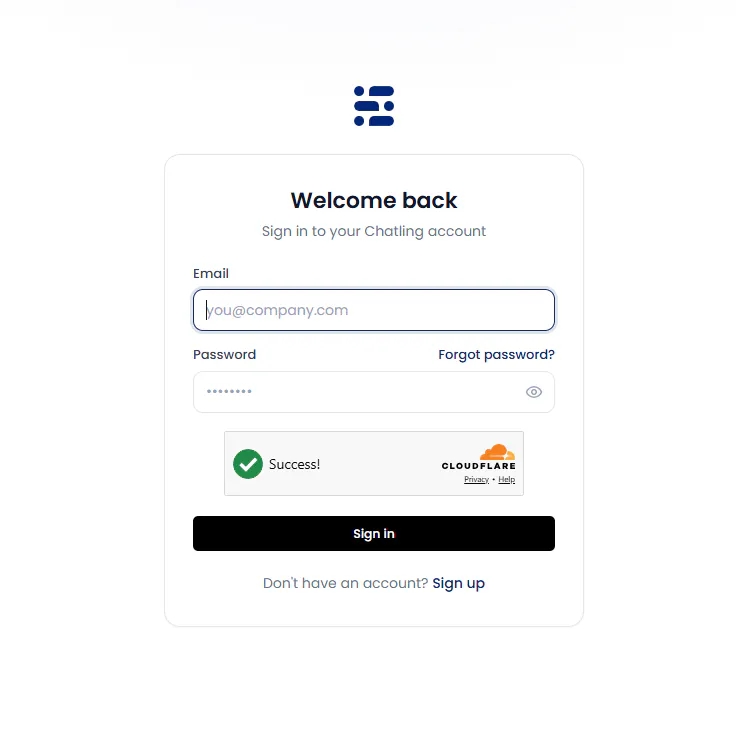
Sign up for Chatling and verify your email address.
From your dashboard, click Create chatbot. You can build one from scratch or choose a template with a pre-built conversation flow.
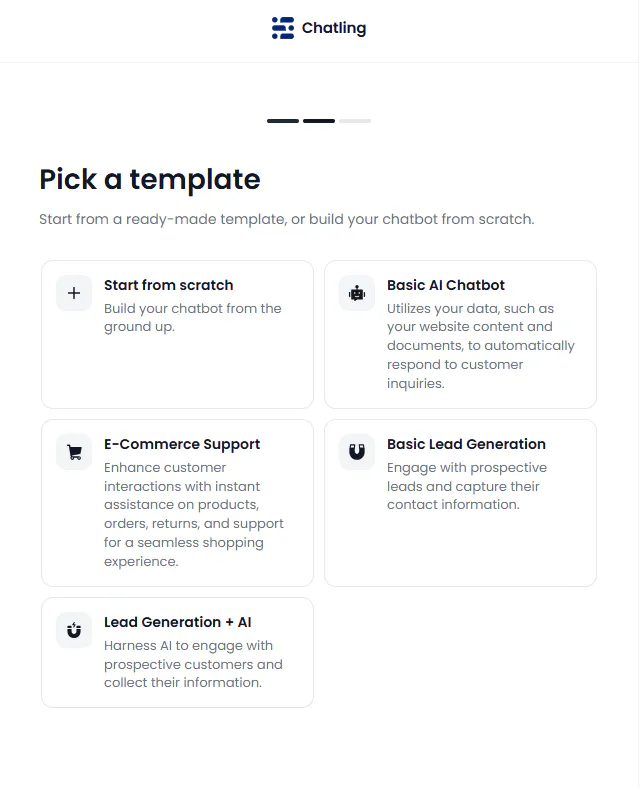
- Choose how to build it: Select a blank chatbot to create your own conversation flow, or choose a template that fits your use case.
- Name your chatbot: Use a name that describes its purpose, or brand it according to your business.
- Create the chatbot: Click Create chatbot to open its dashboard and begin configuring it.
Step 2: Build your conversation flow
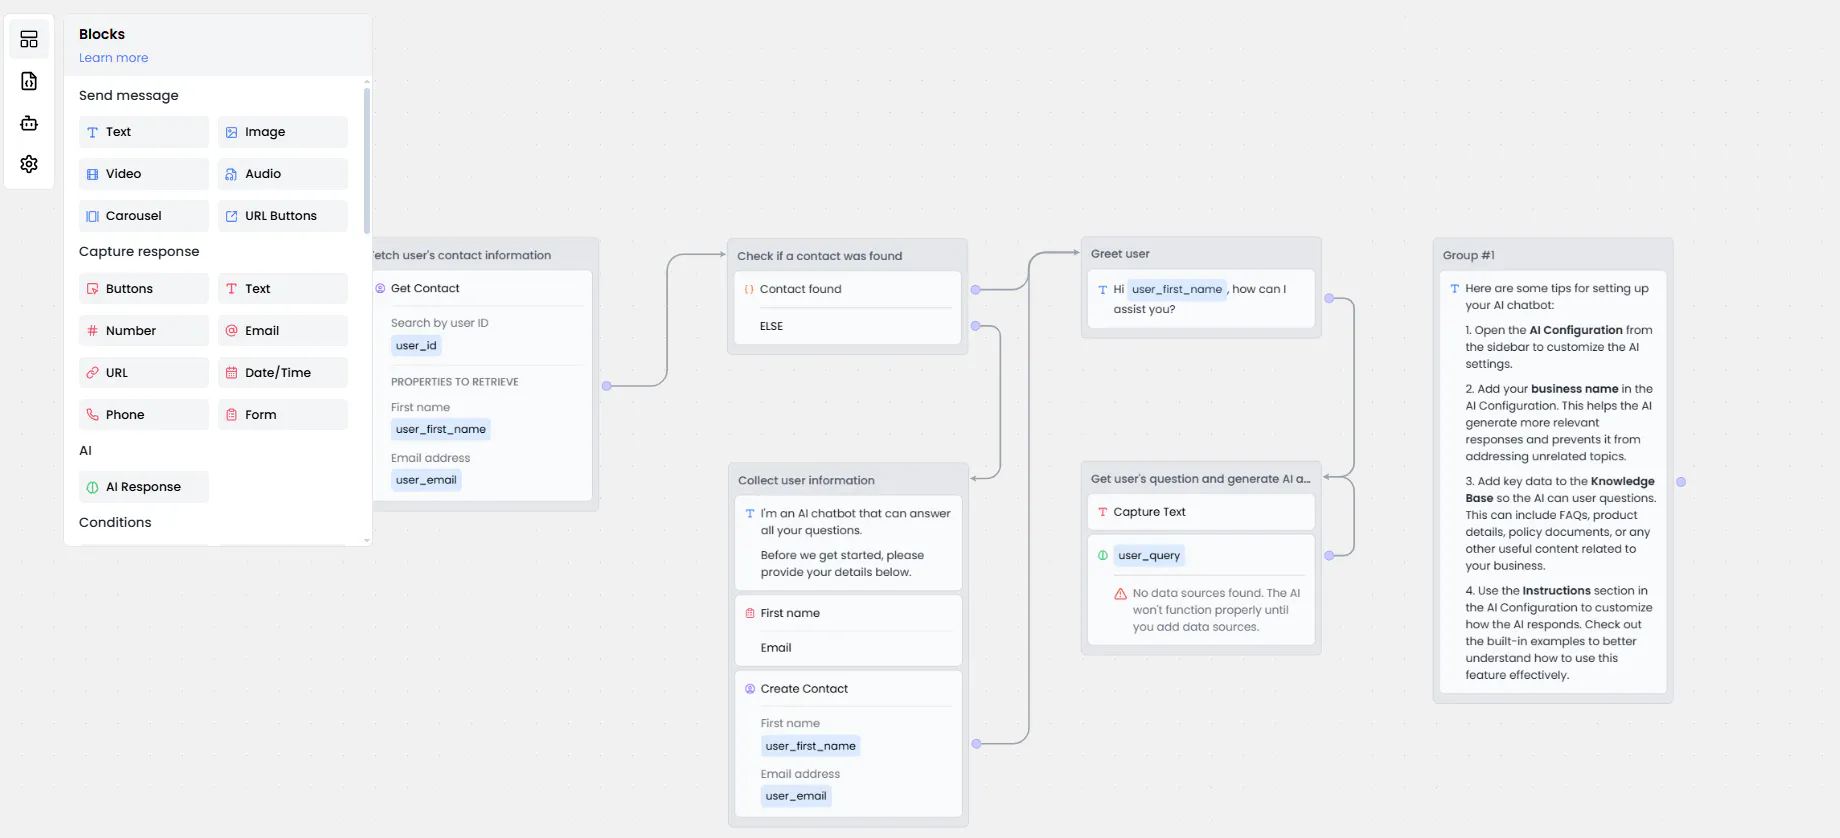
The Builder is where you create the chatbot's conversation. You add blocks to the canvas, configure each block, and connect them to determine what happens when a customer interacts with the chatbot.
- Open the Builder: From your chatbot's dashboard, select Builder. You'll see the canvas, which contains the default Start block.
- Add the first message: Open the Blocks menu in the sidebar and add the block you need. Start with a welcome message that tells customers what the chatbot can help with.
- Give customers clear options: Add buttons or questions that help people choose what they need. For example, a support chatbot could offer "Technical issue," "Account help," and "Billing question."
- Add the next steps: Place the relevant message, question, or action block on the canvas for each option. An online store might direct customers to product details, delivery information, or its return policy.
- Connect the blocks: Draw connections between the blocks to define where the conversation goes next. Make sure every option leads to the intended response or action. Unconnected blocks won't form part of the intended conversation path.
- Configure each block: Click a block to open its settings on the right side of the screen. Add the message text, button labels, questions, or other details required for that step.
- Add conditions where needed: Use conditions when the next step depends on a customer's response. For example, a troubleshooting flow could show different instructions depending on whether the customer can sign in.
Keep the first version focused on the most common customer requests. You can add more paths later as you discover which questions need additional answers or actions.
Step 3: Add intents to recognize different requests
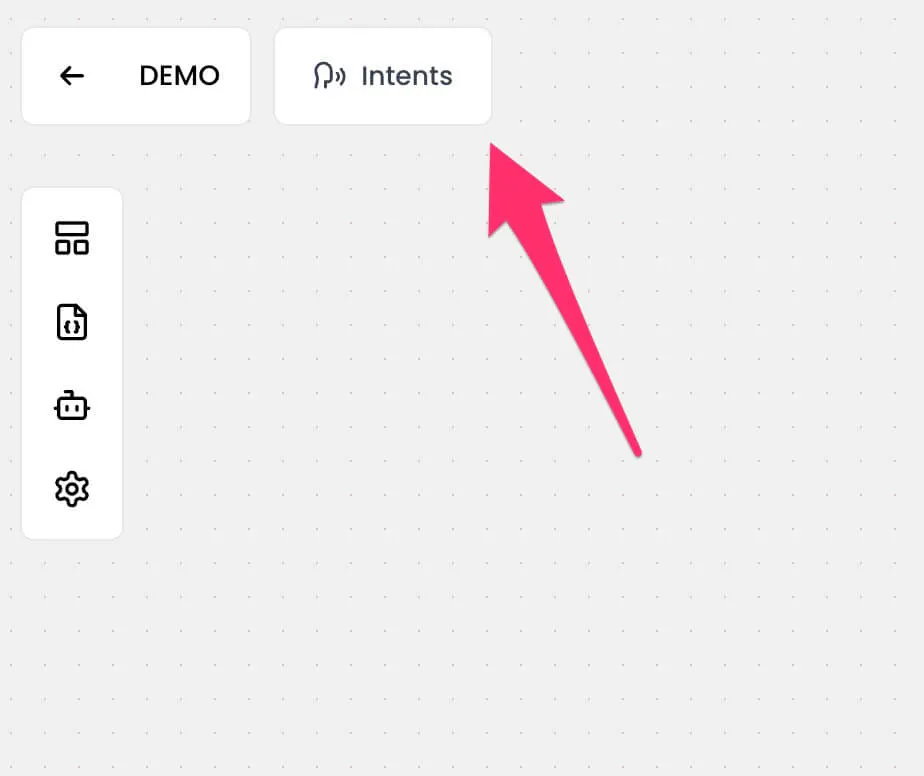
A conversation flow built around buttons works well when customers can choose from a set of options. Intents are useful when people type their questions in their own words and you need to identify what they're asking for.
- List the requests your chatbot should recognize: Start with common customer needs, such as tracking an order, resetting a password, or troubleshooting an integration.
- Create an intent for each distinct request: Give each intent a clear name that describes the customer's goal. Avoid creating separate intents for phrases that mean the same thing.
- Add example phrases: Include different ways customers might express the same request. For a login issue, examples could include "I can't sign in," "My password isn't working," and "I'm locked out of my account."
- Connect the intent to the appropriate response or flow: Make sure the chatbot has a relevant next step when it recognizes the request, whether that's showing troubleshooting instructions or directing the customer to a specific part of the conversation.
- Test different phrasings: Try several variations of each request to check whether the chatbot recognizes them and follows the intended path.
Intents are optional for a simple chatbot that relies entirely on predefined buttons and responses. Add them when recognizing typed requests will help customers get to the right answer more easily.
Step 4: Add and train your chatbot on knowledge base data
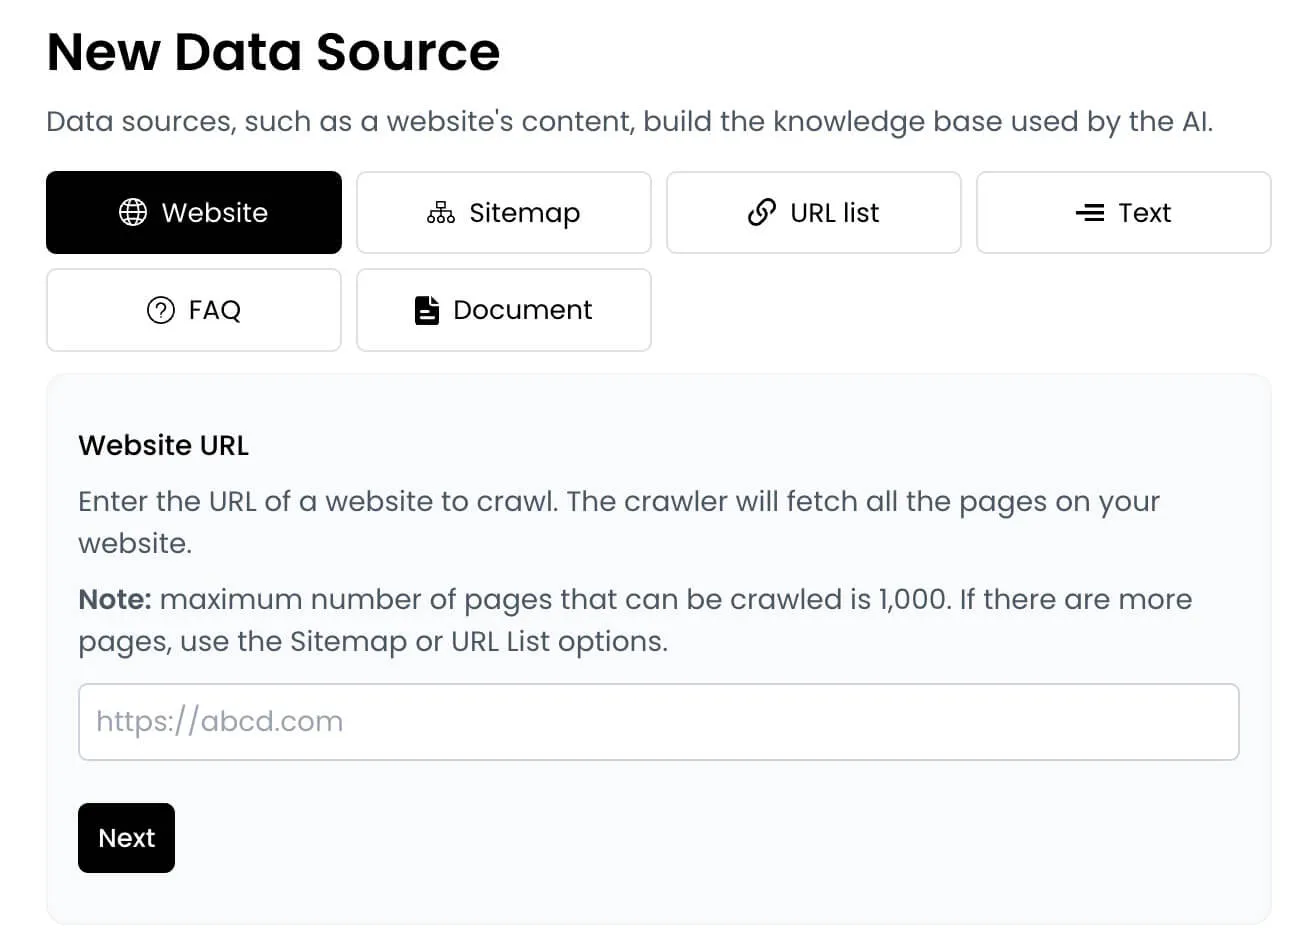
The Knowledge Base supplies the information your chatbot can use to answer business-specific questions. If an AI Response block uses the Knowledge Base as its response source, you need to add the relevant information for it to draw on.
- Open the Knowledge Base: Go to the Knowledge Base area for your chatbot.
- Choose relevant sources: Add the website pages, documents, text, FAQs, or other supported sources that contain the information your chatbot needs.
- Start with your main use cases: For technical support, add setup guides, feature explanations, integration instructions, and common troubleshooting steps. For an online store, start with product details, shipping information, and return policies.
- Check the source material: Remove outdated information and resolve conflicting details before relying on them. If two pages give different refund windows, correct the discrepancy so the chatbot isn't working from inconsistent information.
- Make sure AI responses use the Knowledge Base: In the relevant AI Response block, check that the response source is set to Knowledge Base if you want the answer to draw on those sources.
- Test questions against your sources: Ask questions the chatbot should be able to answer. For example, ask how to connect an integration or whether a product can be returned under a particular condition.
If an answer is wrong or incomplete, check whether the relevant information exists in the sources and whether it's current. Adding more content won't necessarily fix a problem if the information is inaccurate or the chatbot is using the wrong source.
Step 5: Configure AI instructions and responses
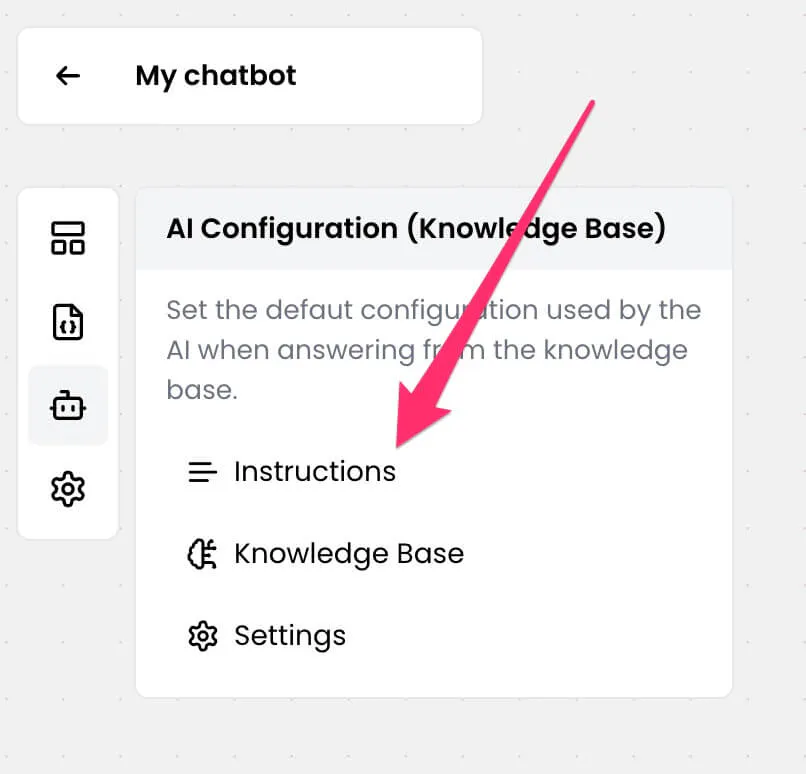
If you want your chatbot to generate answers using AI, configure how it should respond and what information it should use. In Chatling's Builder, the AI Configuration menu lets you configure the default AI settings used when the chatbot generates responses from its knowledge base.
- Open AI Configuration: From the Builder's sidebar, select AI Configuration to review the available default AI settings.
- Define the chatbot's role: Explain what the chatbot helps customers with. For example, a software support chatbot might answer common setup questions and explain product features.
- Set clear response rules: Tell the chatbot to use the available business information, avoid inventing details, and explain when it can't answer a question reliably.
- Define when to involve your team: Specify which requests should be directed to human support, such as account-specific issues that the chatbot can't verify.
- Choose where AI responses belong in the flow: Add an AI Response block where customers need flexible answers rather than a fixed message. Configure the block's response source according to your intended setup.
- Review model and credit usage: If you can choose between AI models, check how their credit consumption differs before settling on one for regular customer conversations.
Use predefined messages when the wording needs to stay consistent, such as a welcome message or a fixed instruction. AI responses are more useful when customers phrase questions differently and need answers based on the information available to the chatbot.
Step 6: Test and publish your chatbot
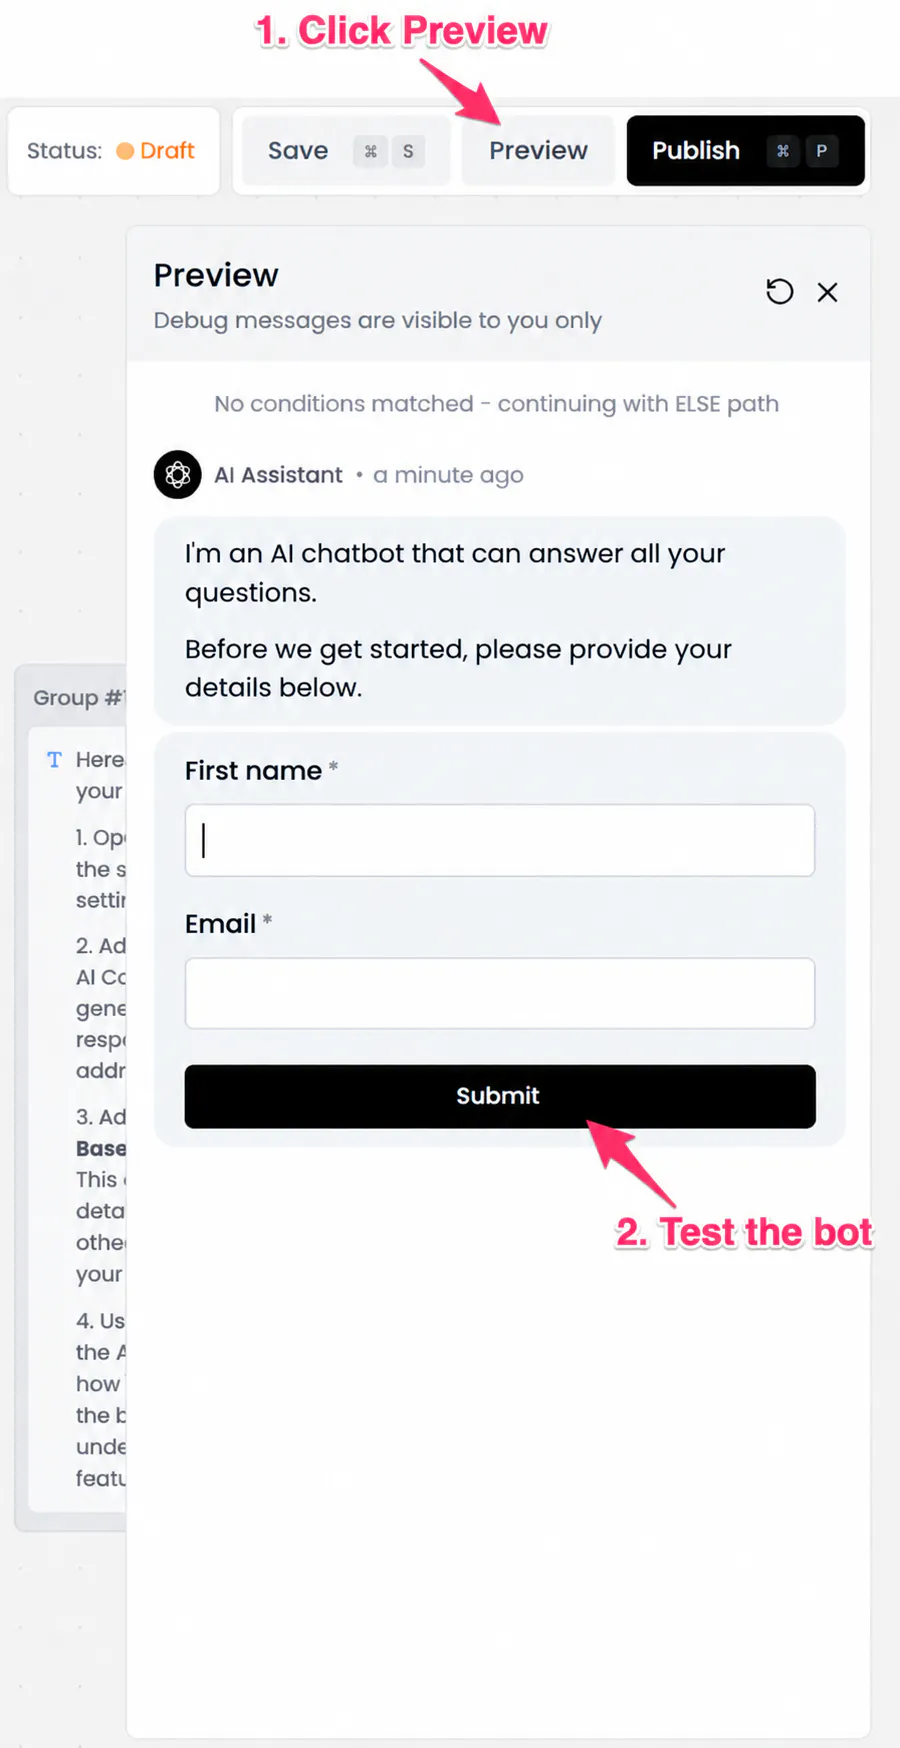
Test the chatbot before making it live. Chatling lets you preview the conversation from the Builder, so you can check the flow and responses while your changes remain in draft.
- Open Preview bot: In the Builder, click Preview bot in the top-right corner to try the chatbot.
- Test common customer questions: Check the main tasks you built the chatbot to handle, such as troubleshooting a common issue or finding a product.
- Try different wording: Ask the same question in several ways to see whether the chatbot recognizes the request and returns a relevant answer.
- Test questions it shouldn't answer: Ask about information that isn't available in its sources. Check whether it acknowledges the limitation instead of inventing an answer.
- Check every conversation path: Try the buttons, conditions, and other actions you configured. Make sure each path leads to the right response and doesn't leave customers at a dead end.
- Fix and retest problems: Return to the relevant block, intent, AI settings, or knowledge source, make the necessary change, and run the test again.
- Save your changes: Chatling saves your work automatically, and you can also click Save in the Builder. Changes remain drafts until you publish them.
- Publish the chatbot: When you're satisfied with the results, click Publish in the Builder to make the latest version live.
Read Next:
- How to Build a Lead Generation Chatbot: Step-by-Step Guide
- A 2026 Playbook to Master eCommerce Customer Service
Your Chatbot Go-Live Checklist
Before launching your chatbot, test the full customer experience. A chatbot might answer questions correctly but still frustrate customers if a button leads to the wrong step, a troubleshooting flow gets stuck, or a request for human help goes nowhere.
1. Check the conversation flow:
- The welcome message explains what the chatbot can help with.
- Buttons, questions, and conditions lead to the correct steps.
- Customers aren't left in a loop or at a dead end.
- Forms and configured actions work as expected.
- Every main path gives customers a useful next step.
2. Check AI responses and knowledge sources:
- Common support and product questions receive accurate answers.
- The chatbot uses current, relevant information.
- It handles unclear questions appropriately.
- It doesn't invent details when the available information is insufficient.
- You've tested different ways of asking the same question.
3. Test human handoff, if enabled:
- The handoff trigger works as expected.
- The conversation is flagged for agent intervention.
- Your team can find and pick up the conversation.
- Notifications are configured if your team needs them.
- Customers receive a clear explanation of what happens next.
Human handoff gives customers a way to reach your team when the chatbot can't resolve a problem or a request needs personal assistance.
In Chatling, you can add a Human Handoff block to the conversation flow, such as after a "Talk to a human" button. You can also configure a handoff path for an intent that recognizes a request to speak to a person.
Read Next: Chatbot vs Live Chat: Which Should You Use for Customer Support?
4. Check your website installation:
- The chatbot appears on the intended pages.
- Visitors can open the widget and send messages.
- It works on desktop and mobile.
- Its placement and appearance suit the website.
- The published version includes your latest changes.
5. Check your free-plan limits:
- You know how many AI credits your plan includes.
- You understand that credit usage varies by AI model.
- You've checked the limits for the features your chatbot needs.
- You know where to review usage after launch.
See Chatling Pricing.
Chatbot vs. Knowledge Base/FAQ Systems
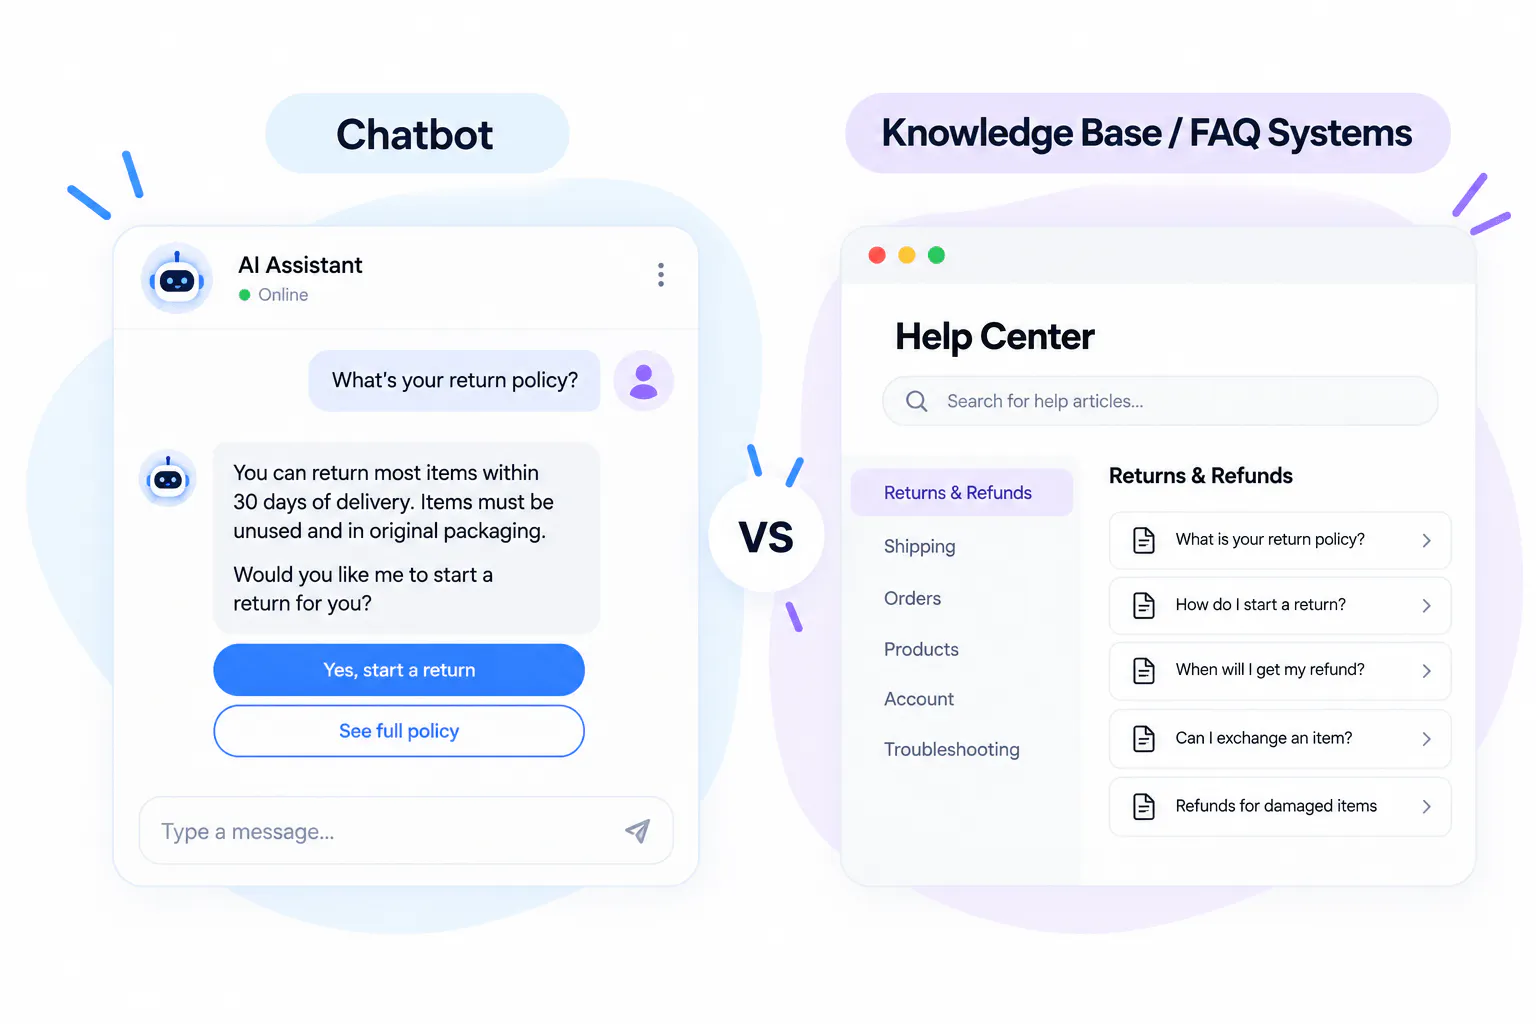
Real-time Interaction vs Pre-Written Answers:
- Chatbots provide real-time, dynamic interactions. They can engage users in a conversation and deliver tailored responses based on context.
- Knowledge Base/FAQ Systems provide pre-written answers to common questions. Users need to search for their queries and receive static, non-interactive responses.
Personalized Experience vs Generalized Information
- Chatbots use AI to offer personalized recommendations, follow-up questions, and adaptive responses based on user input.
- Knowledge Base/FAQ Systems deliver generalized answers that are typically the same for all users, regardless of specific context.
Automation vs Human Interaction
- Chatbots are automated tools that can handle a wide variety of customer interactions, from answering questions to assisting with tasks like order tracking and booking.
- Knowledge Base/FAQ Systems are static databases and require users to find information themselves, meaning there’s no active automation beyond pre-arranged responses.
Flexibility vs Limitations
- Chatbots offer flexibility in engaging with users, answering questions, assisting in transactions, and guiding users through complex interactions.
- Knowledge Base/FAQ Systems are limited to the information provided. If the question falls outside the scope of the database, users may need to seek further assistance.
Benefits of Creating a Chatbot for Free
Creating a chatbot for free lets you explore automation without committing to a paid plan. You can automate routine tasks, simplify customer interactions, and test what works for your business before deciding whether you need more advanced features.
1. Cost-Free Exploration: Free chatbot platforms offer a no-risk way to explore automation, allowing businesses to experiment with customer engagement tools.
2. Simplified Setup: No-code tools make chatbot development accessible to everyone, regardless of technical expertise. These platforms often support FAQs and customer service use cases.
3. Basic Automation Features: Free chatbots handle simple tasks like order tracking, scheduling, and FAQs, helping small businesses streamline operations without added costs.
4. Opportunities to Test and Scale: Starting with a free chatbot allows businesses to assess customer interactions and refine strategies before upgrading to paid solutions. This gradual approach supports informed decision-making and smoother transitions.
5. Proactive Engagement Without Cost: Free chatbots provide proactive customer engagement, offering assistance to users based on their activity.
Read Next: Chatbot Benefits for Business - Boost Efficiency and Customer Engagement
Create a Chatbot for Your Website in Simple Steps—No Coding Needed!
Creating a chatbot for your website is easier than ever with Chatling. By following these simple steps, signing up for the free plan, defining your chatbot's purpose, designing its flow, training it with real data, and embedding it on your site, you can enhance user engagement and streamline tasks without any coding skills.
Take the first step today and see how Chatling can transform your business with AI chatbots. Start building your chatbot for free now!
Read Next: What Is Chatbot Design? Principles, Best Practices & Examples
FAQs
What is a chatbot?
A chatbot is a software tool that communicates with users through text or voice. It can answer questions, provide information, help users complete tasks, and automate common interactions such as customer support or lead generation. AI-powered chatbots can understand natural-language questions and provide responses based on the information they have been trained on.
How does a chatbot work?
A chatbot receives a user's message, interprets what they are asking, and provides a relevant response. Traditional chatbots follow predefined rules or conversation flows, while AI chatbots can use natural language processing and AI models to understand context and handle a wider range of questions.
What are chatbots used for?
Chatbots are commonly used to answer customer questions, provide customer support, collect leads, automate repetitive tasks, schedule appointments, and guide users through processes. Businesses can also use them to provide support around the clock and reduce the number of routine requests handled by human agents.
What are the benefits of chatbots?
Chatbots can provide instant responses, offer 24/7 support, handle multiple conversations at once, and reduce repetitive work for customer support teams. They can also help businesses automate common tasks and give customers faster access to information.
How can I create a chatbot?
You can create a chatbot by first defining its purpose, preparing the information it needs, designing its conversation flow, training it with relevant data, and testing it before deployment. No-code chatbot platforms can simplify this process by letting you build and deploy a chatbot without programming.
Can I create a chatbot for free?
Yes. Some no-code chatbot platforms like Chatling offer free plans that let you create and deploy a chatbot without paying upfront. Free plans may have limits on features, usage, AI credits, or the number of conversations, so the available functionality depends on the platform.
Do I need coding skills to create a chatbot?
No. No-code chatbot platforms allow you to create a chatbot without programming. You can typically define the chatbot's purpose, add your content or data, configure its responses, test the conversation, and embed it on your website through a visual interface. Microsoft also describes no-code and low-code platforms as an option for creating chatbots.
What is the difference between a chatbot and a knowledge base?
A knowledge base is a collection of information that users can search or browse to find answers, while a chatbot provides those answers through a conversation. A chatbot can also ask follow-up questions, understand the context of a request, and guide users through tasks rather than simply displaying pre-written information.